Showing posts with label 31 day challenge. Show all posts

Saturday, 13 October 2012

Day 12 - DIY Quick Pizza Dough

If you havn't noticed already, my posts in this 31 day challenge have all either been focused around inexpensive or quick...or both, and today is no different.  This recipe for pizza dough is both extremely quick and cheap.  There is no waiting around for two or three hours for this dough to rise.


You will need:
     
          1 cup          warm water
          1 tsp.           sugar
          1 tbsp.         yeast
          1 tsp.            salt
          2 tbsp.          olive oil
          1 cup            whole wheat flour
          1 1/2 cups     white flour

Put the warm water in a bowl and dissolve the sugar. Sprinkle the yeast on the water and let sit for about 10 minutes until it becomes frothy (I like to cut up my pizza toppings while I wait).

Add the rest of the ingredients and mix until it comes together then knead until it becomes smooth and elasticy. I have a stand mixer that I let do all the work which makes this recipe even easier.

Let sit on the counter, with a tea towel over top for another 10 minutes (you don't have to do this step but it will help with rolling it out.

Roll it out into your pizza shape and top with your favourite ingredients.

Bake in a 425 degree oven for about 15 minutes or until the cheese is nice and golden.

This would also be great for kids.  You could make them each their own individual pizza then let them have fun topping it with their favourites.

Enjoy!


Thank you for visiting A Cup of Tea and Life.  Please take a moment to share us with your friends and family.

Friday, 12 October 2012

Day 11 - DIY Wrapping Paper

I found this little DIY project on pintrest, it's from the Martha Stewart Website.  This would be another great activity to do with kids.

First you cut out shapes from some tissue paper. I had a piece that had cute little owls and whales on it so I cut those out.

Then put the tissue shapes in between two pieces of wax paper and put that in between two tea towels.

 Then iron away.

When you are done the two pieces of wax paper should be stuck together. Then trim the edges and wrap. My picture of the final product doesn't really do it any justice (it looks really cute in person!) although next time I will add more tissue paper cut outs.

Thanks for visiting A Cup of Tea and Life. Please take a moment to leave a comment, I'd love to hear about your DIY endeavours and/or any DIY suggestions you may have, and share with your friends and family!

Thursday, 11 October 2012

Day 11 - DIY coasters

This is my favourite DIY project so far.  I made coasters and a hot plate out of plain white tiles and scrapbook paper. And the best part is the whole project cost me less than $2. TWO DOLLARS!

I started with four 4x4 white tiles that I bought for 0.29 cents each, a 6x6 white tile that I got for 0.48 cents both of which I purchased at my local hardware store, a piece of scrapbook paper at 0.25 cents and some glue/water mix and felt chair leg protectors both of which I already had.

I first traced the tiles onto the back of the paper (make sure you trace on the back so you aren't left with any pencil marks on the pretty part) and cut out each square.


Brush on some glue/water mix onto the top of the tile then put on the paper and brush more glue on top of the paper making sure you don't miss any spots.


Once the glue was dry I flipped over the tiles and attached my felt squares.  You could also use regular felt or cork board but I had these leg protectors already so that's what I used.

And that's it, you're done.

This project took me all of about 20 minutes (not including drying time). And did I mention that it only cost me $2!  This would be a great little housewarming or Christmas gift for someone.  And for all of those teachers out there this would be a great craft for your students.  You could have them draw a picture on a piece of paper and then glue that to the tile.

Tuesday, 9 October 2012

Day 9 - DIY Refurbished shelf

Do you have any furniture in your home that is as old, if not older than you are?  I do.  There is a little shelf that belonged to my mother and her siblings when they were little. I've used it and now it belongs to my son.  Needless to say it has gone through its fair share of wear and tear.  I've decided that it needed a bit of an update. A quick and simple update that only took one weekend and now it looks like a completely different shelf.

 The shelf had several coats of paint on it to begin with so I had to sand it down before painting.  I then painted it black (it was a can that I had picked up cheap at the Habitat for Humanity Re Store which is a great store to find new and gently used items for the home with all of the proceeds going to this great organization). Once the black was dry I painted a green tree on one side and a blue tree on the other.  Another good idea that I might do on the shelves is to put my sons hand prints on the shelves every year with the date under them.
 This is a simple, easy and cheap way to update any old or worn looking piece of furniture and make it your own.

Just as a side note for those who wish to refurbish something with a little more elaboration and detail. Along with the shelf, I had a dresser that my grandparents used when they were younger that later became my dresser and is now my sons.  My husband surprised me when I was pregnant with a refurbished dresser that had a landscape of the Toronto skyline and my sons initial in a beam of light just like the batman signal.  Now this was a project that took a bit  longer than a week and I can't really tell you how he did it other than he used stencils to paint each layer and he put on new handles. But it just shows how different we can make an old piece of furniture look with just a little time and effort.


Monday, 8 October 2012

Day 8 - DIY Fall Door Decoration

This is a really simple fall door hanger that I made in about 5 minutes (plus a half hour hike with my husband and son to collect the items).  It's simple but pretty, I think.

Here is what you need.


I glue gunned some ribbon to the bottom of a couple of pine cones and then tied ribbon to the stems of maple leaves.  I tied them all together at the top and hung the finished product on my front door...Voila a simple but festive door hanger!

If you wanted to make it a bit bigger you could add more leaves and pine cones and a burlap bow at the top (if I had any burlap handy I would have added this to my hanger).

Thank you for visiting A Cup of Tea and Life.  Please feel free to share with your friends and family.

Sunday, 7 October 2012

DAY 7 - DIY Fancy Pie Crust

Right now my house is filled with the cozy, delicious smell of baking pie.  For thanksgiving I have volunteered to make dessert for our family dinner and I chose to make pumpkin and pecan pie because nothing says fall like pie.  I love to bake but I don't often get the chance to bake pies. So when I decided to make not one but two pies I went all out and fancied them up with some decorations I made out of leftover crust.  It was really simple to do and I figured, if I'm going to take the time and effort to make pies from scratch I might as well make them look pretty. Plus it doesn't take up a whole lot of extra time.

For the pumpkin pie I rolled out the extra crust that I had after cutting it off of the outside edge and used a cookie cutter to cut out little pumpkins. I put them around the edge of the pie with a little bit of egg.  Once they were all on I then brushed the tops of them with more egg so they would go all lovely and golden brown when baked.


For the pecan pie I made a braid to go around the outside. I again rolled out the extra crust but this time I cut three thin strips, flattened them together at the top (a bit of egg helps too, to keep the ends together) and braided it.  Just like for the pumpkins, I brushed some egg around the outside of the pie and put the braid on. Don't forget to brush the top of the braid with egg so it goes golden when baking.


The end result, while not a masterpiece, is a little more festive and fun to look at.

Saturday, 6 October 2012

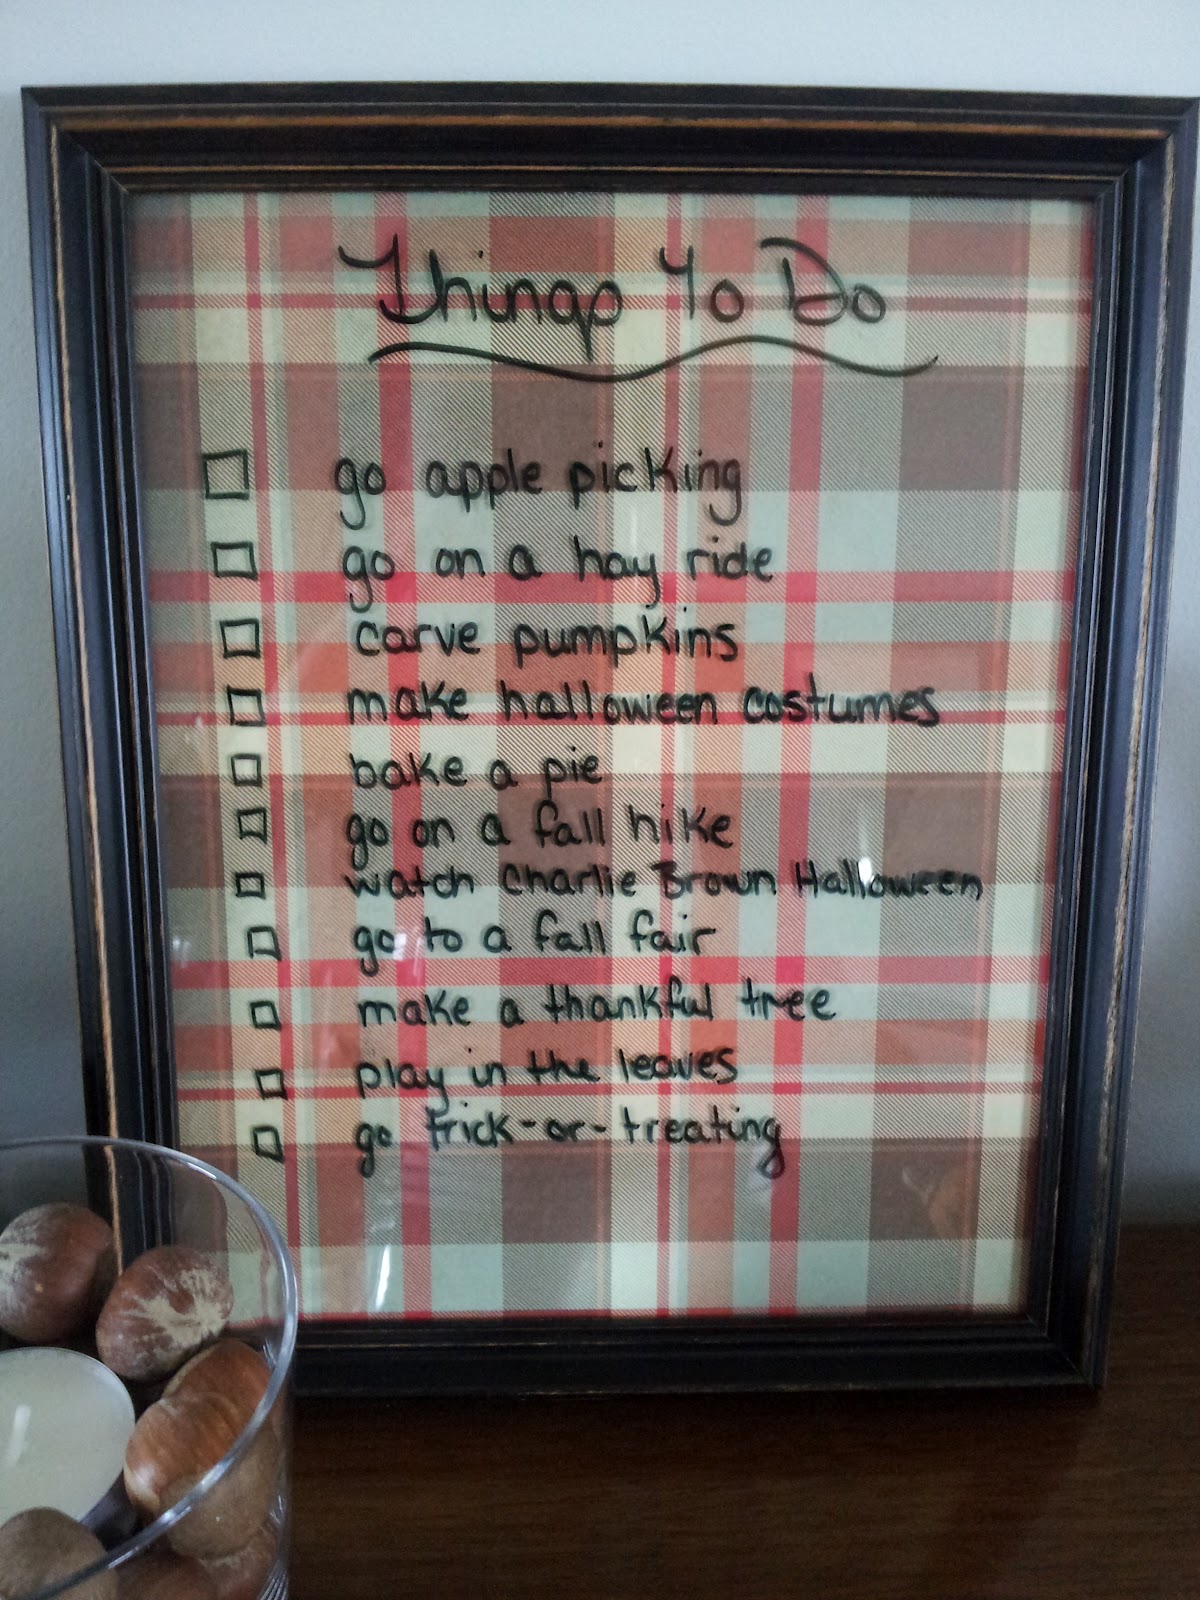
Day 6 - Decor To Do List

I love the holidays and Thanksgiving and Christmas are my two favourite. During the holidays there are many things that my family and I like to do. I usually make a to do list that is either written down on a little piece of paper and stuck on the fridge or in my head. This year I thought it would be nice to incorporate my to do list into my holiday decor that I could display in the house.  This is a cheap and very easy way to decorate for the holidays.

You only need three items, a frame, a piece of pretty scrapbook paper and a dry erase marker.  All I did was cut a piece of pretty fall inspired paper to the size of my frame and put it inside.  I then wrote on the glass my to do list. The marker wipes away easily and I can keep it handy to check off the activities as we do them.


I also cut a piece of Christmas paper that I am keeping in the frame behind the fall paper to interchange as the holiday rolls around.

Thank you for visiting A Cup of Tea and Life. Please take a moment to share with your friends and family.

Friday, 5 October 2012

Day 5 - DIY candle holders

This is a DIY project thought up by me and made by my husband.  I thought of this project while walking around a tree farm last Christmas and noticing all the tree trunk ends that people had cut off the ends of their trees and left on the ground.  They looked so pretty and rustic that I took one home and asked my husband to cut it up and make candle holders out of it.  I first let it sit out in a dry spot to try up the sap in the wood so it would not leak all over.  My husband then cut it into three different length logs and drilled a hole in the top of each big enough to fit a tapered candle.  Done! Just put some nice candles in them and put them on a pretty plate to display and to catch any remaining sap ( I also cut a piece of wax paper to go under each holder to catch sap)


I like to change out the colour of candles throughout the year. Red and green at christmas, orange in fall, green at St. Pattys's day etc. You could also make it big enough to hold a tea light as well, we didn't have a wood drill bit big enough for this though.

Thank you for visiting A Cup of Tea and Life.  Please take a moment to share us with your friends and family.

Thursday, 4 October 2012

Day 3 & 4 - DIY tortilla mix and seeds

So it's only four days into my thirty-one day challenge and I am already behind on my posts.  October is turning out to be one hectic month.  Nevertheless, I am back with two new DIY projects today.  This is a caution that this is going to be a rather lengthy post as I am making up for my tardiness yesterday. The first one is a homemade tortilla mix that you can store in your pantry to be able to make quick and easy tortillas. Here is a link to the recipe, which I found on good old pinterest tortilla mix.  This site also has some other great recipes for mixes.

This was really simple to make. You basically mix all of the dry ingredients together and then cut in the shortening.

Then put it in a nice container in your pantry to access any time you want to make delicious homemade tortillas.


Whenever you feel like making tortillas you just scoop out two cups of your premade mix, add the wet ingredients, mix them together to form a ball and then divide the dough into equal parts. I believe I made 8-10 tortillas from 2 cups of the mix. Then roll them out and place them on a hot pan or griddle and they will cook up in about 4 minutes.


I kept them warm and pliable by placing them in between paper towel. Serve with your favourite filling and enjoy!

DIY project number two is storing seeds for spring.  For the past couple of years, my husband and I have had a smallish garden where we plant a few different fruits and veggies. Instead of buying seeds or seedlings from a store or garden centre we like to save seeds from previous harvests to use the next year.  This helps us to be a little more self-sufficient and not so reliant on grocery stores and garden centres to provide us with our plants.  Plus it saves us a few dollars on seedlings in the spring and it is really simple to do.

All you need to do, whenever you have a fruit or veggie that you would like to plant in your garden the next year is scoop out the seeds, rinse them clean and lay them out to dry.


Once they are dry (make sure that they are completely dry so they don't go moldy) store them in a container until next spring.  I purchased this container from the dollar store and put a sticky label inside each compartment to identify the seeds (because pumpkin seeds look a lot like acorn squash which look identical to butternut squash). Next spring they will be ready to plant!


Thank you for visiting. Please take a moment to share us with your friends and family.

Monday, 1 October 2012

Day 2 - Homemade Subway Art

Since being on pinterest I have come across several pins for subway art.  They seem really nice and a great way to decorate for the holidays without spending too much money.  While there are many sites that graciously offer their subway art for free I thought I would make some of my own.

The first one I made was for my son.  I wanted something personal that I could put up in his room.  It was really easy to make. I just used microsoft word and inserted wordart for each word.  I was able to change the size, colour and font for each word.


Here is one that I did for fall, my favourite season!
 Once done, all you have to do is put it in a frame and find a spot for it in your home.  You can get pretty cheap (but nice looking) frames at Michaels and if you happen to have one of their 40% off coupons, even better!  I plan on making a few more for other events, Christmas, winter, Easter, birthdays, etc. and keeping them all in one frame.  This way I can easily switch them out when needed.

Thank you for visiting! Please take a moment to share with your friends and family.

31 Days of DIY...Day 1

Welcome to the first of thirty-one days of DIY fun.  My first adventure into this challenge is a do-it-yourself fishy crackers.  I found this recipe on pinterest and thought that I would like to try it and see if my son would enjoy them as much as the store bought variety.  I try as much as possible to make things myself rather than purchase them in a store. This way I know what is going into the food and I know that there aren't any additives or preservatives. Here is a link to the recipe I used from The Cupcake Project goldfish crackers

First I put all of the ingredients, except the water in a food processor and blended it until it looked like crumbs.


I then added water a tablespoon at a time until it looked like this...


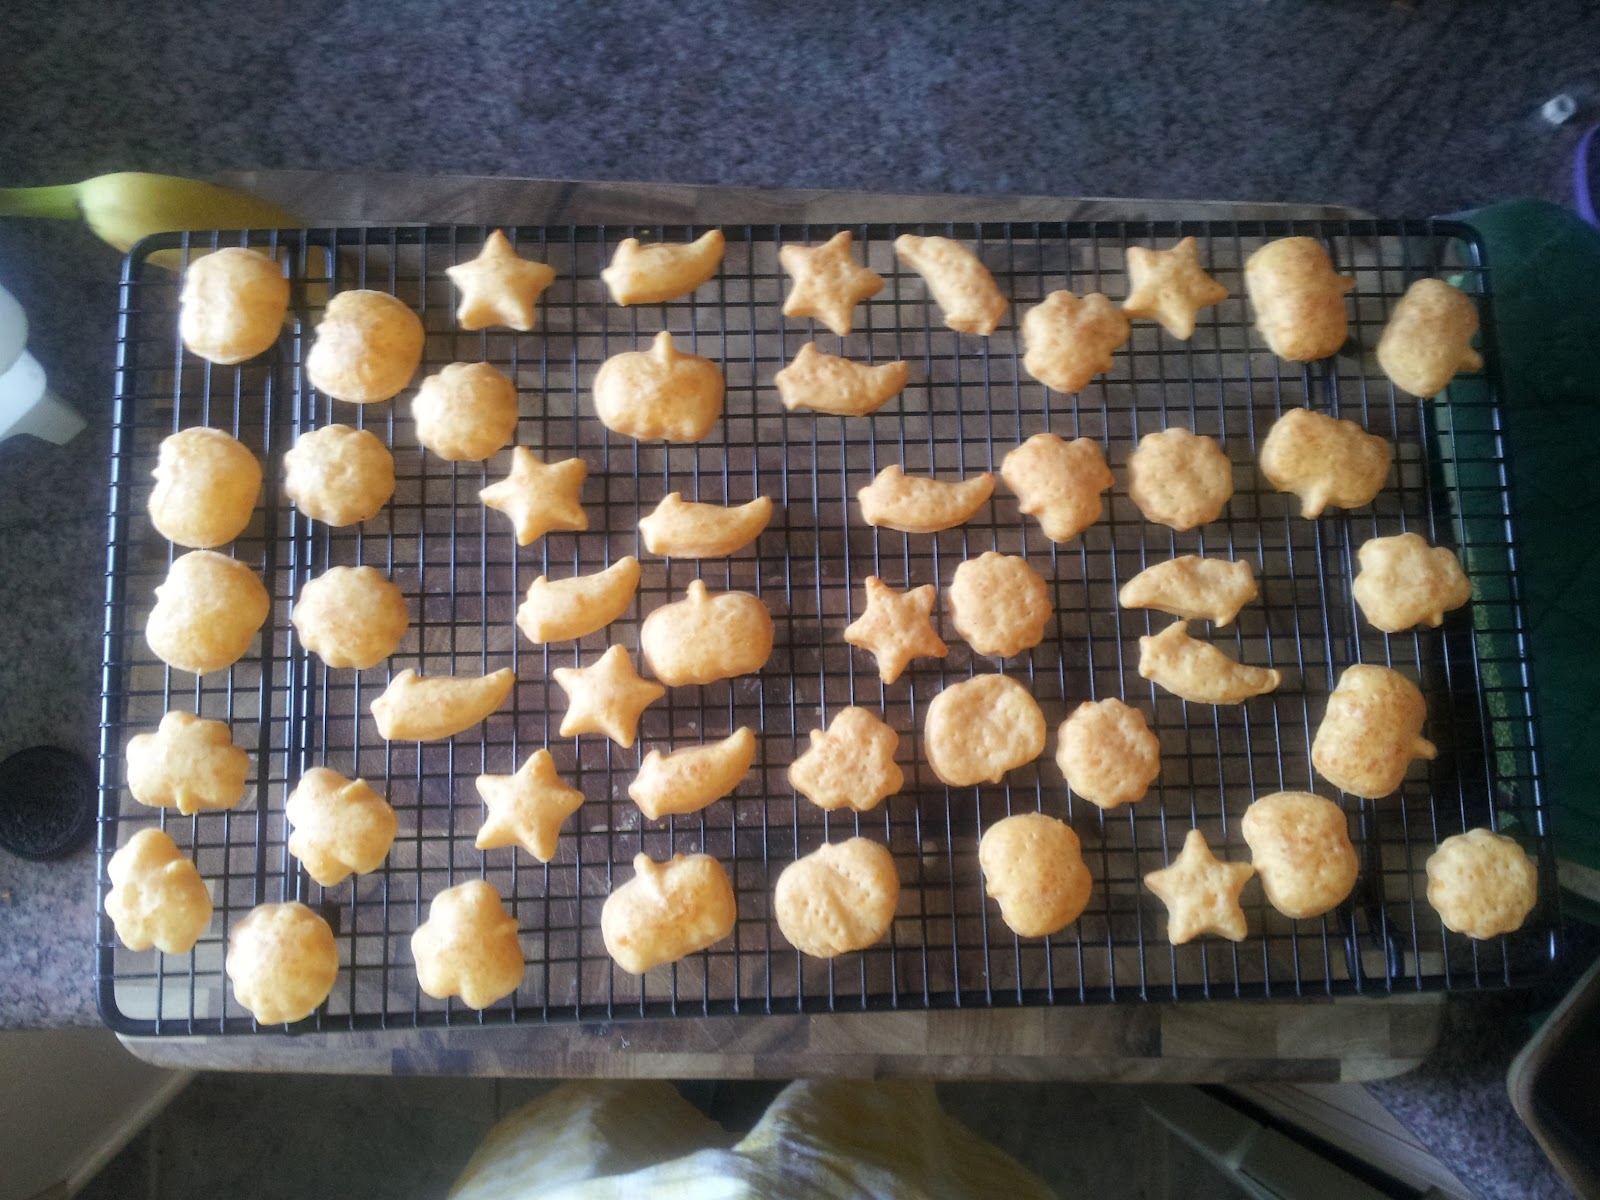
Once it was a nice solid dough I separated it in half wrapped one in plastic wrap, put it in a freezer bag and put it in the freezer so I could make more later.  I then rolled out the other half until it was really thin.  The thinner they are the crispier they will be once cooked. I didn't have any fish cutters and didn't want to go out and buy some just for this recipe so I used some other small cutters that I had already.


This is what they looked like once cooked.  I don't think I rolled them out thin enough this time, they turned out a bit chewy so I would make them even thinner next time.

My son LOVED them and I loved that they were easy to make and I could control what went into them.  I find that the ones in the store are so salty, but not these :) I think that next time, I will make a double batch so I could put all the extra in the freezer.

Anyone have a recipe that they prefer to make from scratch rather than purchase from a store? 

Thank you for visiting! Please take a moment to share us with your friends and family.


Monday, 17 September 2012

The 31 Days Challenge

Hello and welcome to my blog! I've only just recently been introduced to the world of blogging through a couple of blogs that I happened to come across which you can view by clicking on the links at left.  I thoroughly enjoy reading about peoples lives and how they turn the ordinaries of everyday life into an extraordinary and fulfilling life.  This is what I hope to share with you in this blog. 

I'm going to start it off big with Nester's 31 day challenge where, everyday for the month of October I will be blogging about something that I enjoy...DIYing (and yes I do realize that DIYing is not an actual word, but I like it so I'm using it anyway).  So, without further adieu let me introduce you to ...

For all thirty-one days in October (including my birthday) I will be blogging about my adventures in DIYing.  I will be taking ideas from magazines, pinterest, and other blogs and trying them out myself.  I will be trying DIY projects that only require a minimal amount of supply purchasing.  I will try, to the best of my abilities, to use things around the house for my creative adventures because I believe that you don't have to spend a lot (or any money) to turn the ordinary into the extraordinary!

Enjoy!

Is there anyone else out there who is taking the challenge or who is chewing on the idea of challenging themselves?

Thank you so much for reading A Cup of Tea.  Any positive and friendly comments are always enjoyed and encouraged!!